
Your roof is one of the most critical components of your home. It protects you from rain, snow, wind, and sun, and its design significantly impacts durability, energy efficiency, and style. But all these benefits depend on one key measurement: roof pitch. Knowing how to figure roof pitch accurately is essential whether you’re planning a roof replacement, selecting materials, estimating costs, or simply inspecting your home.
In this detailed guide, we’ll break down everything from the basics of roof pitch to practical step‑by‑step measurement techniques and technical considerations.
What Is Roof Pitch? A Technical Definition
Roof pitch is the measure of how steep or flat a roof is. It’s typically expressed as the vertical rise of the roof for every 12 inches of horizontal run. For example, a roof that rises 6 inches for every 12 inches horizontally has a 6:12 pitch. Higher numbers indicate steeper roofs, while lower numbers show flatter roofs.
In some technical contexts, “pitch” and “slope” are used interchangeably, but they can have distinct definitions:
- Slope is the rise over a standard horizontal run (commonly 12 inches).
- Pitch historically described the ratio of total rise to span, though modern usage mostly treats it as rise per 12″ run.
Why Roof Pitch Matters
Understanding how to figure roof pitch isn’t just academic it directly affects construction quality, architectural aesthetics, and long‑term performance. Here’s how:
Drainage and Water Management
A steeper roof allows rain and snow to shed quickly, reducing the risk of leaks, ponding, and water damage. Low‑pitch roofs drain more slowly and need effective waterproofing systems.
Material Compatibility
Roofing materials work best within certain pitch ranges:
- Asphalt shingles typically perform well on medium pitches (4:12–9:12).
- Metal roofing can work on lower pitches.
- Tile, slate, and other heavy materials usually need steeper slopes for effective water shedding.
Structural and Climatic Considerations
In snowy regions, steep pitches help prevent snow buildup and reduce structural stress. In hot, dry areas, lower pitches may offer energy benefits but require careful waterproofing.
Aesthetics and Style
Pitch influences home design: steep roofs give dramatic, traditional character (e.g., Tudor, Victorian), while low pitches suit modern, minimalist architecture.
Standard Roof Pitch Categories
Understanding common pitch ranges helps you categorize and compare roof steepness:
| Pitch Category | Ratio (rise:12 run) | Typical Use |
|---|---|---|
| Very Low | 0.5:12 – 3:12 | Flat or nearly flat roofs |
| Low | 3:12 – 4:12 | Modern home styles |
| Medium | 5:12 – 7:12 | Standard residential roofs |
| Steep | 8:12+ | Snowy climates, classic styles |
Steep roofs drain quickly and add vertical space but increase building complexity and cost. Low‑pitch roofs are easier to build but require better waterproofing.
Tools You Need to Figure Roof Pitch
To accurately figure roof pitch, you’ll want the following basic tools:
- 12‑inch level (or longer)
- Tape measure
- Speed square or roof pitch gauge
- Ladder & safety gear (if measuring from the roof)
- Smartphone with a pitch app (optional, for approximate measurements)
Step‑by‑Step Methods to Measure Roof Pitch
There are multiple ways to figure roof pitch, ranging from attic measurements to digital tools. Choose what works best for your comfort level and access.
Measuring from the Attic (Safest & Most Common)
This method avoids roof access and finds the rise using internal rafters.
Steps:
- Place a level horizontally against a rafter.
- Mark the 12‑inch point on the level.
- Measure vertically from the 12″ mark up to the roof deck. This is your rise.
- That gives the pitch ratio (e.g., 5 inches = 5:12 pitch).
Benefits:
✔ No ladder or roof access needed
✔ Accurate for most roofs
Tip: Take measurements at several points for consistency.
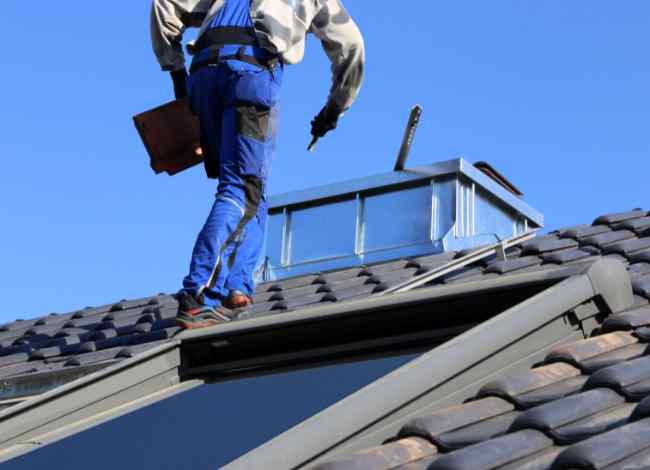
Measuring from the Roof Surface
Only attempt this if you’re comfortable and safely equipped.
Steps:
- Secure a ladder and safety harness.
- Lay the level flat on the roof slope so it runs out at least 12 inches horizontally.
- Measure the vertical distance from the 12″ mark down to the roof surface.
- That measurement gives your rise for 12 inches of run.
Note: Safety first—avoid this during wet or icy conditions.
Using a Pitch Gauge, Speed Square, or App
If you don’t want manual measurement:
- Roof pitch gauge: Hold up to roof slope and read pitch directly.
- Speed square: Align with roof plane and read angle markings.
- Smartphone apps: Use phone gyro/camera to estimate pitch from ground level.
These tools give quick results and good estimates before manual verification.
Technical Calculation: Ratio, Percentage & Degree
When you figure roof pitch, it’s usually expressed as a ratio (X:12). But it can also be shown as a percentage or angle in degrees:
- Percentage: (rise ÷ run) × 100
- Angle in degrees: arctan(rise/run) × (180/π)
For example, a 6:12 roof rises 6 inches over 12 inches and equals roughly 26.6°—a useful number for architects and tools.
Typical Roofing Materials and Pitch Requirements
Different materials perform best at specific pitches:
- Asphalt shingles: Best on medium slopes (4:12–9:12).
- Metal roofing: Can work down to low pitches (even ~1:12).
- Tile/slate: Often requires steeper slopes (6:12+).
Choosing the right material for your pitch ensures water shedding and longevity.
Practical Examples of Figuring Roof Pitch
Example 1: Attic Measurement
You measure 4.5 inches above a 12″ level run inside the attic → 4.5:12 pitch.
Example 2: App Estimate from Ground
Using a phone app, you get a 28° angle, which you convert to a pitch of ~6.3:12.
Taking multiple measurements and averaging results makes your estimate more reliable.
Common Mistakes to Avoid
❌ Only measuring once – Always repeat at multiple points.
❌ Ignoring safety protocols – Especially when climbing.
❌ Assuming material compatibility – Some materials need minimum pitches.
❌ Confusing pitch with slope – They’re related but technically different.
FAQs
What tools are necessary to figure roof pitch accurately?
To figure roof pitch, use a 12″ level, tape measure, and pitch gauge or speed square. Smartphone apps can estimate pitch too, but always verify results for precise measurements, especially before ordering materials.
Can I figure roof pitch without getting on the roof?
Yes measuring from inside the attic using a level and tape measure gives a safe and accurate way to figure roof pitch without accessing the roof surface.
How do I convert roof pitch into degrees?
To convert roof pitch to degrees, use the arctan(rise ÷ run) × (180/π) formula. For instance, a 6:12 pitch converts to about 26.6°, useful in technical and architectural planning.
Why is it important to figure roof pitch before roofing work?
Figuring roof pitch ensures correct material selection, proper drainage performance, accurate cost estimation, and compliance with local building requirements before beginning roofing installation or repairs.
final Thought
Figuring roof pitch is a foundational step in understanding your home’s roof performance, material needs, and structural design. Whether you’re a DIY homeowner or prepping for professional work, learning how to figure roof pitch accurately helps you make better decisions, avoid costly mistakes, and maintain a roof that protects and performs well through rain, snow, and heat.
Accurate roof pitch measurement requires basic tools and safe methods such as attic measurements, roof surface readings, or modern apps. Once you know your pitch, you’ll be better equipped to choose materials, estimate costs, and plan improvements with confidence.